Fundamental Cutting Techniques
Master the Art of Kitchen Cutting: Basic and Advanced Techniques for Everyone
The ability to handle a knife is the cornerstone of cooking.
When cooking for yourself, your family or to sell, mastering kitchen cuts can be the difference that turns a simple meal into a gastronomic experience.
This detailed guide will take you through basic and advanced cutting techniques, explaining not only what each cut is and what it’s for, but also how to do it step by step.
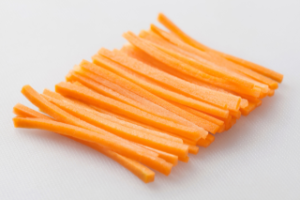
Julienne: This cut creates thin strips similar to matchsticks.
Start by peeling the vegetable and cutting it into 5-6 cm segments. Then cut thin slices 2-3 mm thick and stack them.
Finally, cut the stacked slices lengthways to form thin sticks. This cut is ideal for sautéing quickly, as the vegetables cook evenly and quickly due to their thin thickness.

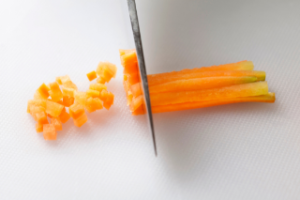
Brunoise: To make a brunoise, start with the julienne. Take the julienne strips and cut them crosswise into small 2 to 3 mm cubes. This cut is perfect for adding texture and flavor to dishes such as sauces, soups and garnishes.

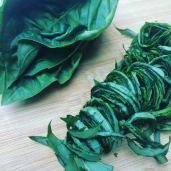
Chiffonade: Perfect for herbs and leafy greens, chiffonade enhances their appearance and flavor. Stack the leaves, roll them lengthways into a tight cigar and cut crosswise into thin strips. When unrolled, you will have thin, elegant strips, excellent for salads, soups and as a garnish.

Piqué onion: This is an aromatic cut. Peel an onion, make a shallow X-shaped cut at one end to prevent the onion from falling apart, and stick 3 to 4 cloves into the onion, adding a bay leaf if desired. Place the onion in sauces and stocks to cook and infuse flavor.
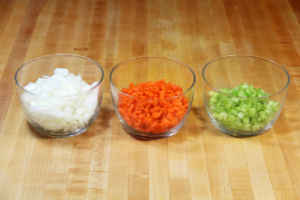
Mirepoix: Cut onion, carrot and celery into medium-sized cubes (approximately 1 cm). You don’t need to be as precise as with brunoise, but try to keep the size consistent so that they cook evenly. This cut forms the basis for many traditional dishes, adding a rich, deep flavor.

Paysanne: Cut the vegetables into slices approximately 1/2 cm thick and then cut these slices into squares or rectangles. This cut doesn’t have to be perfect, but it should be thin enough for the vegetables to cook quickly while retaining their rustic shape.
Batonnet: For a batonnet, cut the vegetable into 6 mm slabs and then into 6 mm wide sticks. This cut is a preparation for brunoise or can be used as is, perfect for vegetables in stir-fries or as sticks for dipping in sauces.
Tourner: For the tourner cut, you need a tourner knife or a small, curved knife. Cut the vegetable into thick pieces and then make cuts by turning the vegetable to create an oval shape with 7 sides. This cut is mainly used for decorative purposes.
Lozenge: Ideal for creating an interesting presentation, this cut is made by slicing the vegetable and then cutting the slices into lozenge shapes. It’s great for decorating dishes and adding a visual touch.
Conclusion
Mastering these kitchen cutting techniques will improve not only the presentation of your dishes, but also the taste and texture. Armed with these skills, you’re ready to transform simple ingredients into culinary creations that will delight and impress.
Elevate your culinary skills with our complete guide to kitchen cutting techniques, from basic to advanced cuts, and impress with dishes that look and taste like those of a professional chef.
This article offers a practical and detailed overview of kitchen cuts, ensuring that even an amateur cook can learn and apply techniques that will make a difference in everyday cooking.
Practice makes perfect, and every cut is an opportunity to hone your craft.